A soggy Beef Wellington isn’t a recipe failure; it’s a breakdown in its internal moisture management system.
- The primary enemy is steam, not just water, which must be controlled at every layer before and during the bake.
- A crêpe barrier is a non-negotiable « sponge » designed to absorb moisture that the prosciutto layer simply cannot handle.
Recommendation: Master the « Trail Test » to ensure your duxelles is perfectly dry and always rest the final roast on a wire rack, never tented with foil, to guarantee a crisp crust.
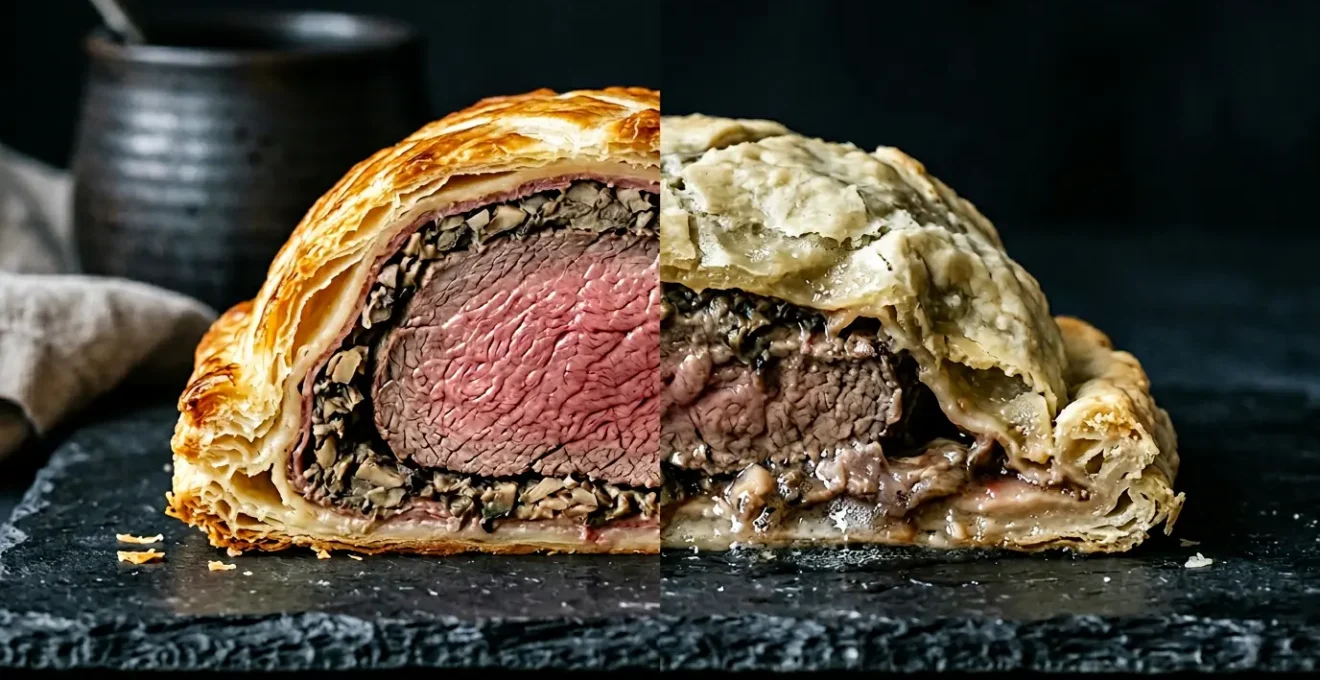
The moment of truth arrives. Your Beef Wellington, a golden, burnished dome of pastry, is presented to appreciative guests. You followed every step with meticulous care. The sear was perfect, the duxelles fragrant, the wrapping tight. Yet, as the knife glides through, revealing the pink centre, you see it—that unmistakable, disheartening band of damp, pale pastry at the base. The dreaded soggy bottom. It’s a common frustration for even the most dedicated home cook, turning a showstopper into a source of quiet disappointment.
The standard advice is often repeated: « dry your mushrooms, » « cool your beef, » « get the oven hot. » While correct, this advice treats symptoms, not the root cause. It fails to explain the delicate physics at play inside your creation. The truth is that a perfect Wellington is not just an assembly of ingredients; it is an engineered system for managing moisture and heat. The failure of this system is what leads to disaster, no matter how precisely you followed the recipe’s instructions.
This guide moves beyond simple steps. We will diagnose the problem from a specialist’s perspective, treating the Wellington as a technical challenge of culinary engineering. Forget what you think you know. The key is not in working harder, but in understanding the « why » behind each technique. We will deconstruct the entire process, revealing how to control the flow of steam and moisture at every critical point: from the puff pastry’s lamination to the final, crucial rest. This is how you move from simply following a recipe to truly mastering the dish.
To help you navigate this culinary deep-dive, this guide is structured to address each potential point of failure in the system. The following summary outlines the key areas we will dissect to ensure your next Beef Wellington is flawless from top to bottom.
Summary: A Specialist’s Diagnostic Guide to the Perfect Beef Wellington
- Why Does Your Puff Pastry Go Soggy Despite Perfect Oven Temperature?
- How to Make a Duxelles Dry Enough to Protect Pastry but Moist Enough to Add Flavour?
- Prosciutto or Crêpe Barrier: Which Wrapping Method Produces Better Results for Home Cooks?
- The Resting Mistake That Turns Your Perfect En Croûte Into a Pool of Juice on the Board
- When Should You Start Each Stage of En Croûte for Perfectly Timed 7pm Dinner Service?
- Pan-Seared or Terrine: Which Foie Gras Preparation Impresses More at Dinner Parties?
- The Place Setting Mistake That Immediately Reveals Your Table as British Rather Than French
- Why Does Your Carefully Set Table Look Cluttered Instead of Elegant?
Why Does Your Puff Pastry Go Soggy Despite Perfect Oven Temperature?
You followed the instructions to the letter, preheating your oven to a blistering 220°C. Yet, the bottom remains stubbornly pale and damp. The misunderstanding lies in the fundamental physics of puff pastry. It does not simply ‘bake’ like a cake; it inflates. This lift is created by thousands of micro-explosions of steam as the water within the dough and butter layers vaporises. This process requires a precise, intense heat to happen quickly, ideally between 200°C and 220°C, to set the structure before the butter melts out.
The problem is external moisture. If steam or juices from the filling penetrate the raw pastry layers *before* they have had a chance to inflate and set, the dough becomes waterlogged. Instead of turning to steam and creating lift, the water turns the flour into a paste. No amount of oven heat can rescue dough that has already been compromised in this way. The oven’s heat will simply steam the wet base, creating a gummy, grey layer. As the EasyCleanCook culinary experts note, even ambient conditions play a role: « High humidity levels can introduce moisture into the dough, disrupting the delicate balance between fat and flour. » This is why the barriers we place inside are more important than the oven itself.
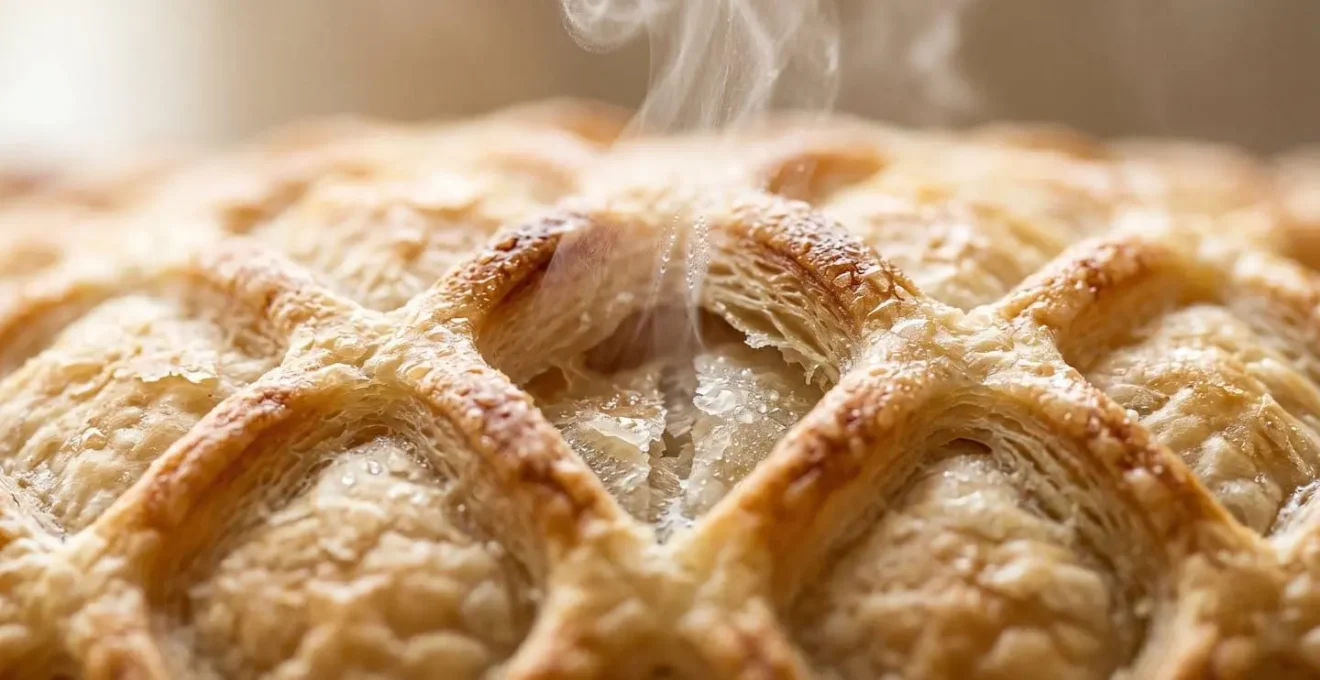
Think of the pastry as the final waterproof layer. Its structural integrity must be protected from the inside at all costs. Scoring the top allows steam from the filling to escape, preventing a pressure build-up that could force moisture downwards. But this is a last resort. The real battle against sogginess is won long before the Wellington ever sees the oven.
How to Make a Duxelles Dry Enough to Protect Pastry but Moist Enough to Add Flavour?
Mushrooms are over 90% water. The primary purpose of cooking duxelles is not just to soften them, but to drive off this vast amount of water. If left in, this moisture will turn to steam in the oven and instantly saturate your pastry from the inside. Many cooks, fearing a dry filling, stop cooking too soon, leaving a delicious but dangerously wet paste that is the number one cause of a soggy bottom. The goal is to create a deep, flavour-concentrated paste, not a moist mince.
True flavour concentration happens only after the majority of water has evaporated. As the water leaves, the mushroom flavour compounds, the umami, become intensely packed together. As the expert behind Forager Chef advises, you don’t need to resort to squeezing the mushrooms in cheesecloth; « I prefer to keep all the flavor in mine. » The secret is patience and a reliable method to test for dryness. Professionals don’t guess; they use a visual cue to confirm the water is gone.
This is where technique separates the amateur from the master. By letting the mushrooms sit and cook without constant stirring, you allow a wide surface area for evaporation. The « Trail Test » is the definitive way to know when your duxelles is ready. When you can draw a line through the mixture and it leaves a clean, dry path that doesn’t immediately fill with liquid, you have reached the perfect state: maximum flavour, minimum water.
Your Action Plan: The Duxelles « Trail Test » Method
- Maximise Surface Area: Spread your finely chopped mushrooms in a single, even layer in a wide, dry pan. Do not crowd the pan; work in batches if necessary.
- Apply Steady Heat: Cook over medium heat for 15-20 minutes. Avoid the urge to stir constantly; let the moisture evaporate. Stir only occasionally to prevent sticking.
- Perform the Trail Test: Drag a wooden spoon or spatula across the bottom of the pan. If the trail left behind remains clean and dry for a few seconds, the duxelles is ready. If it immediately fills with liquid, continue cooking.
- Check for Paste-Like Consistency: The final mixture should be dark, thick, and hold its shape. When pressed with a spoon, it should look like a dense pâté, not a loose mince.
- Emergency Drying: If your duxelles still seems wet after 20 minutes, spread it thinly on a baking tray and place it in a low oven (around 100°C or 210°F) for 10-15 minutes to dry it out further, which will also deepen the flavour.
Prosciutto or Crêpe Barrier: Which Wrapping Method Produces Better Results for Home Cooks?
The second line of defence in your moisture management system is the barrier wrap. This layer has two jobs: to add flavour and, most critically, to physically block any remaining moisture from the duxelles or the beef from reaching the puff pastry. For years, prosciutto was the standard. However, many professional chefs, most famously Gordon Ramsay, now insist on an additional layer: a thin, savoury crêpe. Why? Because prosciutto and crêpes perform fundamentally different roles.
Prosciutto is a flavour enhancer and a fat barrier. It crisps up during cooking, adding a salty, umami kick. But it is not a sponge. Its moisture-blocking capability is limited, especially with supermarket-grade prosciutto which can have inconsistent thickness. The crêpe, on the other hand, is engineered to be a hygroscopic matrix. As The Foodie Eats explains, « The crepe sits between the prosciutto and the puff pastry and acts like a moisture barrier, catching what the inner layers release so the pastry can stay crisp. » The flour and egg in the crêpe create a perfect sponge, soaking up any juice before it can travel outwards.
For a home cook seeking a reliable, repeatable result, the crêpe is not an optional « fancy » step; it is your insurance policy against a soggy bottom. It standardises a variable, providing a consistent absorbent layer that thin or fatty prosciutto cannot guarantee. The combination of both offers maximum protection: the prosciutto for flavour and the crêpe for moisture absorption.
| Criterion | Prosciutto Barrier | Crêpe Barrier |
|---|---|---|
| Primary Function | Fat-rendering frying barrier that adds salty flavor | Pure absorbent sponge that soaks up moisture |
| Moisture Control | Moderate – can trap steam if too thick or fatty | Excellent – eggs and flour create moisture-absorbing matrix |
| Ease for Home Cooks | Variable – supermarket prosciutto has inconsistent thickness and high salt | High – homemade crêpe offers standardized control |
| Temperature Sensitivity | Requires ice-cold beef surface to prevent sweating before baking | Can be applied to warmer fillet without issue |
| Flavor Contribution | Strong salty, umami depth | Neutral, allows beef and duxelles to shine |
| Professional Recommendation | Use both layers for maximum protection | Essential layer – described as non-negotiable by Ramsay |
The Resting Mistake That Turns Your Perfect En Croûte Into a Pool of Juice on the Board
You’ve done it. The Wellington is baked, the crust is golden and crisp. You proudly place it on a wooden board for the final rest, perhaps tenting it with foil to keep it warm. Fifteen minutes later, you return to find a pool of beef juice has collected underneath, turning your perfect bottom crust into a sodden mess. This common error undoes all your hard work at the final hurdle. The mistake is twofold: the surface and the cover.
When a large roast like a fillet of beef is removed from the oven, its internal temperature continues to rise due to residual heat. This phenomenon, known as carryover cooking, is significant; research from ThermoWorks shows that the internal temperature can increase by a further 10-15°F. During this time, the muscle fibres, which have tensed and squeezed out their moisture during cooking, begin to relax and reabsorb those precious juices. Rushing this process by slicing too early is what causes juice to flood the plate.
However, for an en croûte dish, *how* you rest is as important as *that* you rest. Placing the Wellington on a solid board traps steam underneath, directly steaming the bottom crust. Tenting with foil creates a high-humidity environment, softening the entire pastry shell you worked so hard to keep crisp. The ThermoWorks culinary team cautions, « Use extra care if you want to preserve a crispy exterior on a turkey or roast. » The professional solution is simple but non-negotiable.
Case Study: The Gordon Ramsay Resting Protocol
Professional kitchens using the Ramsay method rest the Beef Wellington for 10-15 minutes after it reaches an internal temperature of 125°F (for medium-rare). The crucial step is that the meat is placed on a wire cooling rack, not a solid board. This allows air to circulate freely around the entire Wellington, keeping the bottom crust from steaming and becoming soggy. Furthermore, it is never tented with foil. This open-air rest allows the puff pastry to remain perfectly crisp while the beef’s internal temperature rises to a perfect 130°F through carryover cooking, ensuring the meat is both juicy and the pastry is flawless.
When Should You Start Each Stage of En Croûte for Perfectly Timed 7pm Dinner Service?
Beef Wellington has a reputation for being a stressful, last-minute dish, but this is a misconception born from poor planning. The secret to a calm, controlled execution for a dinner party is to embrace the art of *mise en place* on a grander scale. A perfect Wellington is not made on the day of serving; it is assembled over 48 hours. By reverse-engineering your timeline from the moment you want to serve, you can break down the process into manageable, low-stress stages.
The beauty of this dish is that many of its components, like the duxelles and crêpes, can and *should* be made in advance. The main assembly of the chilled, wrapped fillet can be done the day before, leaving only the final pastry wrapping and baking for the day of the party. This not only spreads out the workload but also improves the final product. A thoroughly chilled, pre-assembled Wellington is firmer, easier to wrap in pastry, and less likely to leak moisture.
Following a structured timeline transforms the experience from a frantic race against the clock into a composed, elegant process. Below is a sample production schedule designed to have a flawless Beef Wellington on the table at precisely 7:00 PM, allowing you to manage your time and enjoy your own party.
- Day -2 (Two days before, anytime): Prepare the mushroom duxelles, ensuring it is cooked until completely dry using the « Trail Test. » Separately, prepare a batch of thin, savoury crêpes. Allow both to cool completely, then store them in airtight containers in the refrigerator.
- Day -1 (One day before, evening): Sear the beef tenderloin on all sides, then cool it rapidly. Brush the cooled fillet with English or Dijon mustard. Lay out your prosciutto, cover with the crêpes, and spread the chilled duxelles over them. Tightly wrap the beef in this package and roll it into a firm log using cling film. Refrigerate overnight.
- Day 0 – 5:00 PM: Remove the chilled, wrapped log from the refrigerator. Gently unwrap it. Roll out your puff pastry and wrap the log, trimming any excess and sealing the edges with egg wash. Place the wrapped Wellington back in the refrigerator for a final 30-minute chill to firm up the pastry.
- Day 0 – 5:45 PM: Preheat your oven to 220°C (425°F). This is the time to begin preparing any side dishes that require oven time after the Wellington comes out.
- Day 0 – 6:00 PM: Score the top of the Wellington, brush with egg wash, and sprinkle with sea salt. Place it in the preheated oven and bake for 30-45 minutes, or until the internal temperature reaches 120-125°F for a perfect medium-rare.
- Day 0 – 6:40 PM (approx.): Remove the Wellington from the oven and immediately transfer it to a wire rack to rest for at least 15 minutes. Do not cover it. Use this window to finish your sides and warm your plates.
- Day 0 – 6:55 PM: Using a sharp serrated knife, slice the rested Wellington into generous portions and arrange on a warmed platter.
- Day 0 – 7:00 PM: Serve immediately to your impressed guests, while the pastry is at its peak crispness and the beef is a perfect 130°F.
Pan-Seared or Terrine: Which Foie Gras Preparation Impresses More at Dinner Parties?
For the host aiming for ultimate decadence, incorporating foie gras with the Wellington is a classic move. However, the choice of preparation—a last-minute pan-sear versus a make-ahead terrine—has significant implications for your stress levels, the flow of your kitchen, and the palate of your guests. While a sizzling pan of foie gras is dramatic, it introduces a high level of day-of stress and can actually detract from the main event.
Pan-searing foie gras requires precise timing and generates significant smoke and odour, competing for precious stove-top space and clean air during the most critical pre-service window. Furthermore, serving a hot, intensely rich slice of seared fat immediately before the equally rich Wellington can overwhelm the palate. It’s a bold flavour statement that can leave guests feeling full before the centrepiece even arrives.
A chilled foie gras terrine, on the other hand, is a masterclass in elegant preparation. It is made two to three days in advance, completely removing it from the day-of workload. Served cold, it acts as a clean, luxurious palate-primer, its coolness and smooth texture providing a beautiful contrast to the hot, crisp Wellington that follows. It speaks of sophisticated, long-term preparation rather than last-minute, frantic skill. For a composed and truly impressive service, the terrine is unequivocally the superior choice for the home entertainer.
| Factor | Pan-Seared Foie Gras | Foie Gras Terrine |
|---|---|---|
| Day-Of Stress Level | High – requires last-minute attention during critical Wellington prep time | Low – completely prepared 2-3 days in advance |
| Kitchen Smoke/Odor | Significant – competes with Wellington for oven/stovetop space | None on service day |
| Palate Impact | Hot, rich fat can overwhelm palate before Wellington arrives | Cold preparation cleanses and primes palate for rich main |
| Perceived Effort | Showcases live cooking skill, dramatic presentation | Implies days of sophisticated preparation, looks more complex |
| Temperature Serving | Must be served immediately while hot | Flexible timing, served chilled |
| Modern Alternative | N/A | Foie gras parfait/mousse in verrines – best of both worlds |
The Place Setting Mistake That Immediately Reveals Your Table as British Rather Than French
You’ve mastered a British classic with French technique. Now, to complete the sophisticated, international ambiance, you decide on a formal French table setting. But one small, almost unconscious detail in your cutlery placement can instantly signal « British » to a knowledgeable eye: the direction of the forks.
The distinction is rooted in history. In Britain, forks are traditionally placed with the tines facing up. The French tradition, however, is to place them with the tines facing down. This wasn’t originally an aesthetic choice, but a practical one. French aristocracy and wealthy bourgeoisie had their silverware engraved with their family crest or hallmark on the back of the handle. Placing the fork tines-down was a way of displaying this mark of quality and status to their guests. While the practice has remained, the reason is now largely traditional.
This is just one of several subtle differences that define a truly French table setting versus a British or American one. Understanding these nuances allows you to create a deliberate and authentic atmosphere for your meticulously planned meal. The irony, of course, is in serving a quintessentially British dish like Beef Wellington within a classic French setting, creating a ‘best of both worlds’ gourmet experience.
- Fork Direction: British place forks with tines pointing up. The French place them with tines pointing down, historically to display hallmarks on the back.
- Glassware Positioning: A British setting typically places the water glass directly above the main knife. In a formal French setting, the water glass is placed to the upper left of the primary wine glass.
- Bread Plate: A bread plate is standard in British and American formal settings, placed to the upper left. It is traditionally absent in formal French service, where bread is placed directly on the tablecloth.
- Dessert Cutlery: The British style is to place the dessert spoon and fork above the plate. French tradition dictates that dessert cutlery is brought to the table with the dessert course itself.
Key Takeaways
- A soggy bottom is a systemic failure of moisture management, not a single cooking error. Control the steam, control the dish.
- The crêpe layer is not optional; it is a non-negotiable « sponge » engineered to protect the pastry’s structural integrity where prosciutto alone cannot.
- Resting a finished Wellington on a wire rack without a foil tent is the most critical step to preserve the crisp, golden crust you worked so hard to create.
Achieving True Elegance: Why Less is More on Your Table
You’ve conquered the Wellington. You’ve planned the timeline. The final piece of the puzzle is the stage itself: the dinner table. A common mistake made in the pursuit of elegance is to over-decorate, resulting in a table that feels cluttered and chaotic rather than sophisticated. True elegance in table setting comes from restraint and a confidence in negative space.
The principle is simple: every single item on your table should have a clear purpose. Anything superfluous—excessive decorative trinkets, overly large or tall centrepieces, redundant glassware—detracts from the main event. Your Beef Wellington is the star of the show, the ultimate centrepiece. As the experts at Whisk & Dine state, you must « Ensure your floral or candle arrangements are low-profile and complementary, not competitive. » A tall floral arrangement forces guests to peer around it, breaking conversation, while a cluttered table leaves no room for serving dishes or for the meal to « breathe ».
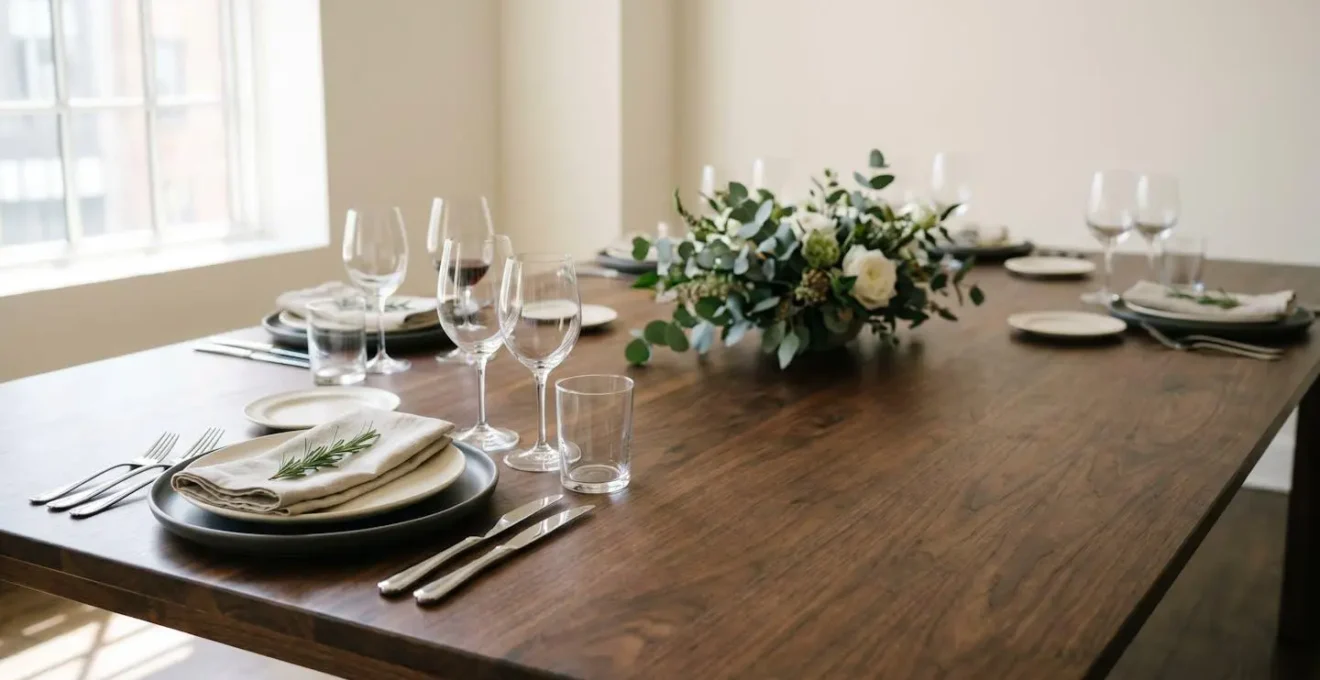
Embrace minimalism. A clean, well-spaced table setting with high-quality, essential elements—polished cutlery, sparkling glasses, crisp linen—creates a far more powerful impression of luxury and confidence than a table groaning with decorations. It signals that you know the food is the star and that everything else is there only to support it. This curated approach gives each element importance and allows your guests, and your magnificent Wellington, to take centre stage.
With the technical and aesthetic details mastered, the final step is to orchestrate your dinner party with confidence. Start today by creating your own 48-hour timeline, and transform this daunting challenge into an elegant, stress-free culinary triumph.